Step 1:
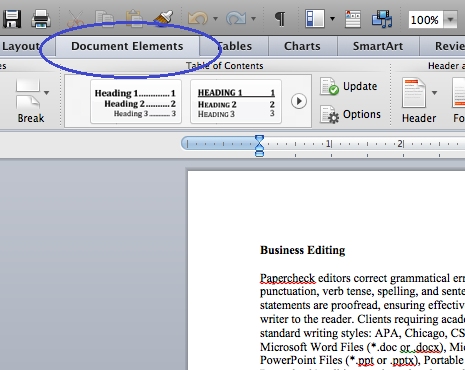
To create a bibliography, open your document and locate the Document Elements tab.
Step 2:
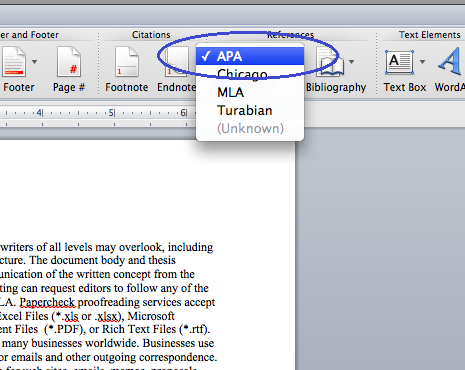
Under the References section, choose your referencing style from the drop-down menu, circled in blue in the screenshot below.
No products found.
Step 3:
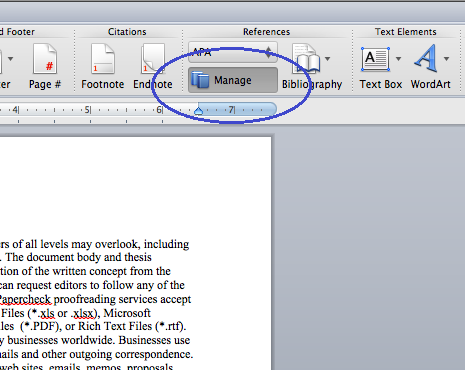
Place your cursor where you would like to enter your first citation and select Manage from the References section.
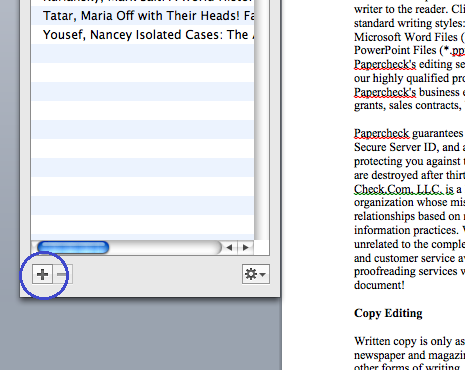
Step 4:
A citation window will appear. Click the + in the bottom left corner.
No products found.
Step 5:
You will see a Create New Source window. Fill out the source information and click OK.

Step 6:
Notice that a reference has been inserted into the document. Follow Step 4 to enter the remaining citations into the document.
Tips:
If you would like to cite a source that you have already entered, simply double-click on the source from the list and a citation will be entered into the document.
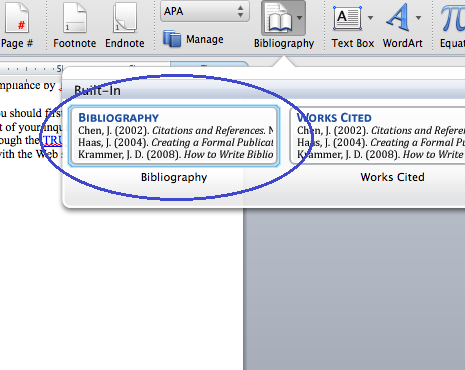
Step 7:
Place your cursor at the end of your document and select Bibliography from the drop-down arrow next to the Bibliography icon.
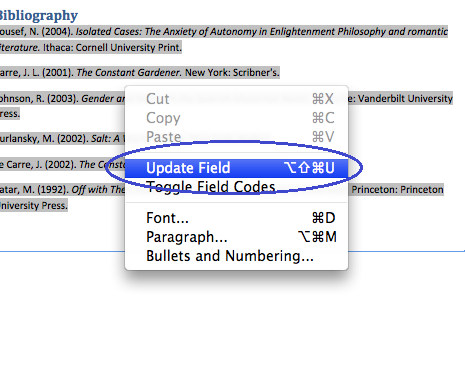
Tips:
If you wish to update your bibliography after adding more references, right-click anywhere on the bibliography and select Update Field.